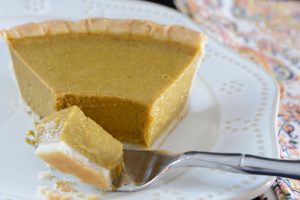
free from gluten and the top 8 food allergens
Pumpkin pies are a sure sign that Thanksgiving is right around the corner.
It’s hard to imagine this holiday meal without pumpkin pie, so one of the most requested desserts at the Thanksgiving table is getting a magical makeover. We’ve made this traditional favorite fuss-free and free for all to enjoy.
Not All Pumpkins Are Created Equal
Some pumpkins are best suited for carving, while others are good for baking and cooking.
Carving pumpkins, a.k.a. jack-o’-lantern pumpkins, have a thinner shell and typically less flesh than pie pumpkins. This makes them easier to carve but not a good option for making pies.
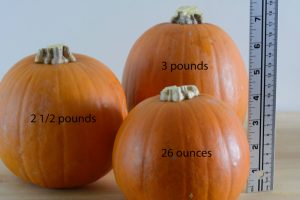
Pie pumpkins, a.k.a. sugar pumpkins, are smaller and packed full of flesh. The pulp is less grainy than the pulp in carving pumpkins and is sweeter. Ranging anywhere from around two to six pounds, sugar pumpkins are the best choice for cooking and baking. The sugar pumpkins below weigh in at 26 ounces, 2-1/2 pounds and 3 pounds. We measured them to show how petit they are.

Sugar Pumpkin Varieties
- Baby Bear
- Baby Pam
- Cinderella, a.k.a. Cheese Pumpkins
- Fairytale
- New England Pie
- Winter Luxury
For the Purists
This recipe calls for canned pumpkin puree, but here are some tips for making your own.
One small sugar pumpkin should make enough puree to equal one (15-ounce) can, which is a scant 1-3/4 cups. To be exact, the can contains 1-1/2 cups, 2 tbsp and 1 tsp puree. We’ll go with the scant 1-3/4 cups.
While you can bake a pumpkin whole, it saves time by cutting in half before baking. Plus, you have the chance to scoop out all the seeds, which you can toast as a snack.
Using a sharp knife, slice a small piece of skin off one side of the pumpkin so when laid on its side it won’t roll around. Remove the stem and split pumpkin in half from top to bottom. Scoop out seeds and fiber with a large metal spoon.
Lightly brush the flesh with cooking oil. Place halves, flesh side down, on a baking sheet lined with parchment paper or foil. Bake in an oven preheated to 350-degrees F for 45-50 minutes, until fork tender. Test in several places for doneness. The exact time will vary depending on the size of your pumpkin. Remove from oven and place on a cooling rack for about 10 minutes, just until the pumpkin is cool enough to handle.
With a large spoon, peel away the very thin skin and discard skin. Place flesh in a food processor and process for several minutes, until smooth. You can also blend using an immersion blender. At this point, you can drain pureed pumpkin in a cheesecloth to remove excess water. Store in refrigerator for up to 5 days or freeze for up to 3 months.
If you choose to bake a whole pumpkin, place on a baking sheet lined with parchment paper or foil. Bake in an oven preheated to 350-degrees F for approximately 90 minutes or until tender. Remove from oven and let cool. When cool enough to handle, cut in half vertically and remove the seeds and stringy pulp with a large spoon. With the spoon, peel away the skin and discard skin. Follow remaining instructions as discussed above.
About the Filling
Traditional pumpkin pie consists of pumpkin puree mixed with eggs, evaporated and/or sweetened condensed milk, sugar and spices.
Goodbye milk and eggs. Our version stands up to any traditional pumpkin pie in flavor and consists of pumpkin puree, pure maple syrup, spices, cornstarch, coconut milk and a tablespoon of coconut oil, which is optional.
We know this will be a pie to remember.
Tidbits
- Around 50 million pumpkin pies are consumed each Thanksgiving.
- In 1929, Libby’s Meat Canning Company of Chicago introduced a line of canned pumpkin. This brought convenience and quickly replaced the need for roasting one’s own squash.
- According to the Guinness Book of World Records, the largest pumpkin pie ever baked weighed 2,020 pounds and measured just over 12 feet long. It was made with 900 pounds of pumpkin, 62 gallons of evaporated milk, 155 dozen eggs, 300 pounds of sugar, 3-1/2 pounds of salt, 7 pounds of cinnamon and 2 pounds of pumpkin spice.
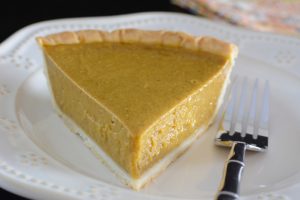
Enjoy, and have a Happy Thanksgiving!
Pumpkin Pie
Yield 1 (9-inch) pie
Free of: gluten and top 8 allergens.
It's hard to imagine a Thanksgiving celebration without one of the most requested desserts, pumpkin pie. We've made this traditional favorite fuss-free and free for all to enjoy.
Ingredients
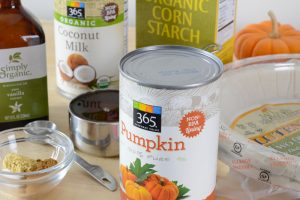
1 (15-ounce) can pure pumpkin puree
1/2 cup pure maple syrup
1-1/2 tsp ground cinnamon
1/2 tsp kosher salt
1/2 tsp ground ginger
2 tsp pure vanilla extract
3 tbsp cornstarch
1 cup coconut milk
1 tbsp coconut oil, melted and at room temperature - optional
1 (9-inch) frozen gluten free and vegan pie shell, such as Wholly Wholesome
Instructions
- Preheat oven to 350-degrees F.
- In a large bowl, whisk together the puree, maple syrup, cinnamon, salt, ginger and vanilla. Set aside.
- In a small bowl, whisk together the cornstarch and coconut milk. Pour into the pumpkin mixture and whisk together. Transfer filling to a food processor (see recipe notes). Puree for several minutes until the filling is smooth, adding coconut oil in a steady stream while machine is running.
- Pour mixture into an unbaked pie shell (see recipe notes). Smooth surface with an offset spatula. Gently tap the pie several times to bring any air bubbles to the surface that may have been created during mixing (see recipe notes).
- Place the unbaked pie on a small baking sheet or you can place directly in the oven. We find it easier to handle on a small baking sheet. Bake for 55-65 minutes or until the pie is set. The filling will puff a bit, which is okay. You want to be sure the filling is set.
- Remove pie from oven and allow to cool for about an hour. When the pie is cool enough, transfer to the refrigerator. Chill for several hours or best overnight before serving.
- Serve plain or with whipped topping of your choice.
Notes
- An immersion blender can be used in place of a food processor. We do not suggest mixing with a hand held or stand mixer as this will incorporate air into the filling. This mixing creates needed leavening in many baked products, but we don't want this trapped air expanding in our pie to possibly create blisters or cracks.
- There's no need to thaw the unbaked frozen crust. However, if you bake directly from the freezer, you will need to add about 3 minutes to the usual baking time.
Courses Sweets

This looks amazio! I have always wanted to make pumpkin pie from a sugar pumpkin. Since I am now GF it was just a matter of finding the right recipe for my dietary needs ( oh, yes! PIE is a dietary necessity). Thank you Chefs for your post! I won’t be left out of dessert this Thanksgiving holiday! ?
Hi! We’re glad you’re excited and hope you love this pie as much as we do. We’ve already made 3 this season and it’s not even Thanksgiving yet. 🙂 Don’t ever hesitate to reach out if you have any questions. Happy Holidays!
Wow.. this is a great recipe. The photos of the mise en place is very helpful. We have a Whole Foods close by, so i will try out their products.. Thanks for the helpful tips on roasting pumpkin. but it is nice to have the can options when you don’t have time to use fresh pumpkin.
Hi JJ, Have fun making the pie! We’d love to hear what you think of it.